Create a Hyper-Personalized Email Broadcast
Send a unique AI-written email to every contact in your audience, generated on the fly from each contact's own data.
Before You Begin
- A sender available to select in the From Sender dropdown
- Any cadence mandates you plan to attach, created in Library > Mandates
- An audience to send to: either a list, or contact data you can filter on
- Enough balance in your account wallet to cover the campaign — writing is charged per contact, and the wizard will not let you schedule a campaign your balance cannot cover
A standard broadcast sends one template to everyone on the list — which means the message fits nobody precisely. Intelligent Outreach in Communications > Email > Broadcasts works differently: for each contact in your chosen audience, it generates a unique email, written from that contact's own data and your campaign objective.
This works because Zyntro tracks every relationship natively, so the AI writing each email has the full context — including the topics a contact has actually shown interest in. A re-engagement campaign can therefore speak to what each person cares about, not to an average of your whole list.
Every message is also reviewed before it can send. Once written, it is held and checked against your mandates, your brand voice and your objective. Messages that pass are queued for delivery; messages that do not are held back rather than sent.
The trade-off is cost: each contact carries a per-contact charge that covers writing the message and reviewing it. Use Intelligent Outreach when that individual tailoring is worth it. When one identical template is genuinely right for everyone, the Simple Broadcast option in the same menu does that job with no per-contact charge.
This guide walks through the wizard — Strategy, Audience and Schedule — through to launch.
Steps
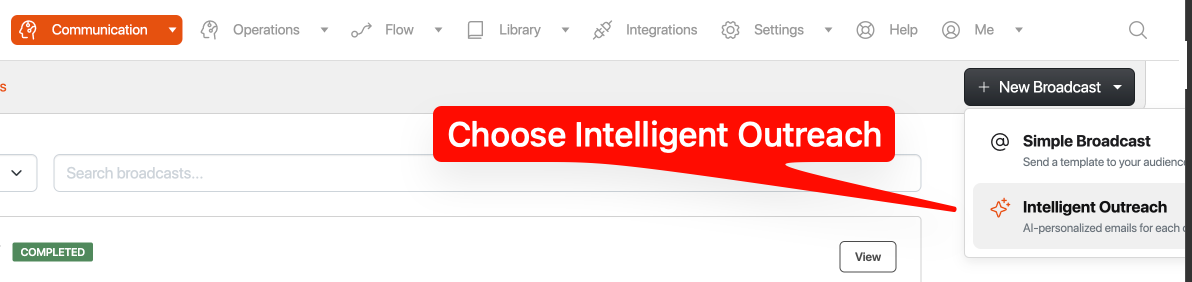
Open the New Broadcast menu and choose Intelligent Outreach
Go to Communications > Email > Broadcasts and open the New Broadcast dropdown. Both broadcast types launch from here: Simple Broadcast sends one identical template to your audience, while Intelligent Outreach generates a unique AI-written email per contact.
Choose Intelligent Outreach when each recipient needs an individually tailored message — for example, re-engaging contacts based on the topics they showed interest in.
Define the strategy (Step 1: Strategy)
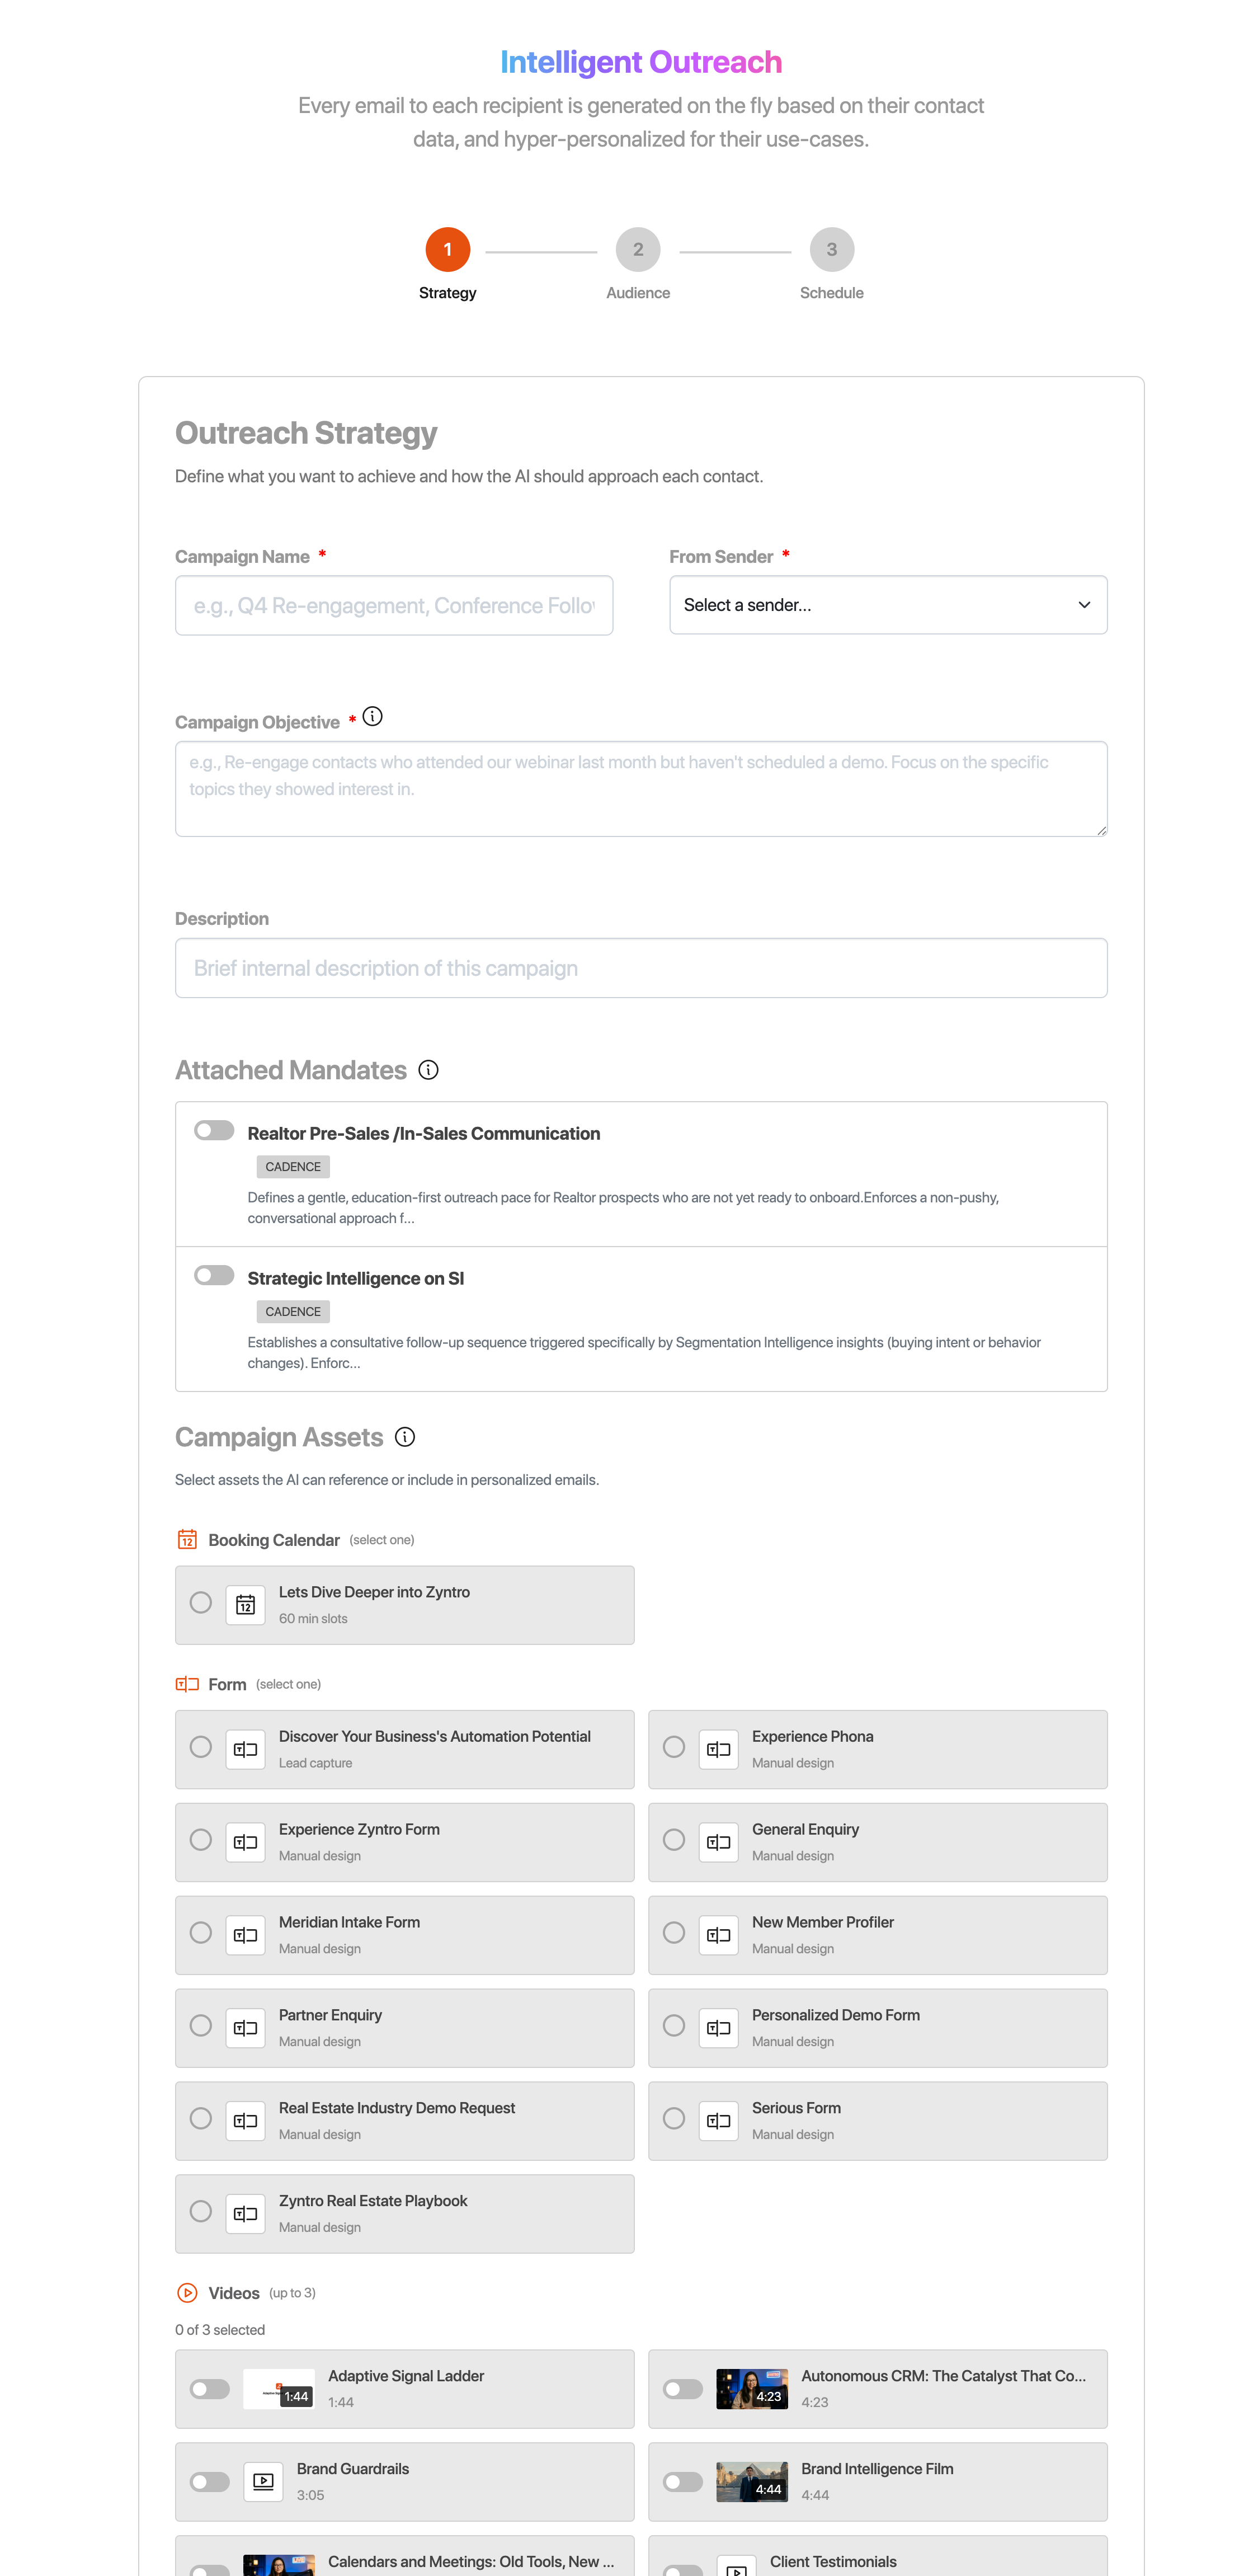
The Strategy step tells the AI what this campaign should achieve.
- Campaign Name (required): an internal name such as
Q4 Re-engagementorConference Follow-up. - From Sender (required): choose the sending identity from the dropdown.
- Campaign Objective (required): describe in plain text what the campaign should achieve and how each contact should be approached. This is the single most important field on the page. The objective governs every generated email — it is treated as binding, it is the last thing the writer reads before composing, and a date, an action or a link you put in it will reach the recipient. Write it like a briefing for a capable colleague.
- Description (optional): a brief internal note about the campaign.
- Attached Mandates: switch on the cadence mandates that should shape outreach pacing and approach. Mandates are the dos and don'ts the AI must follow, so attaching the right ones keeps every email aligned with how you communicate. A mandate outranks the objective where the two disagree.
Define the audience (Step 2: Audience)
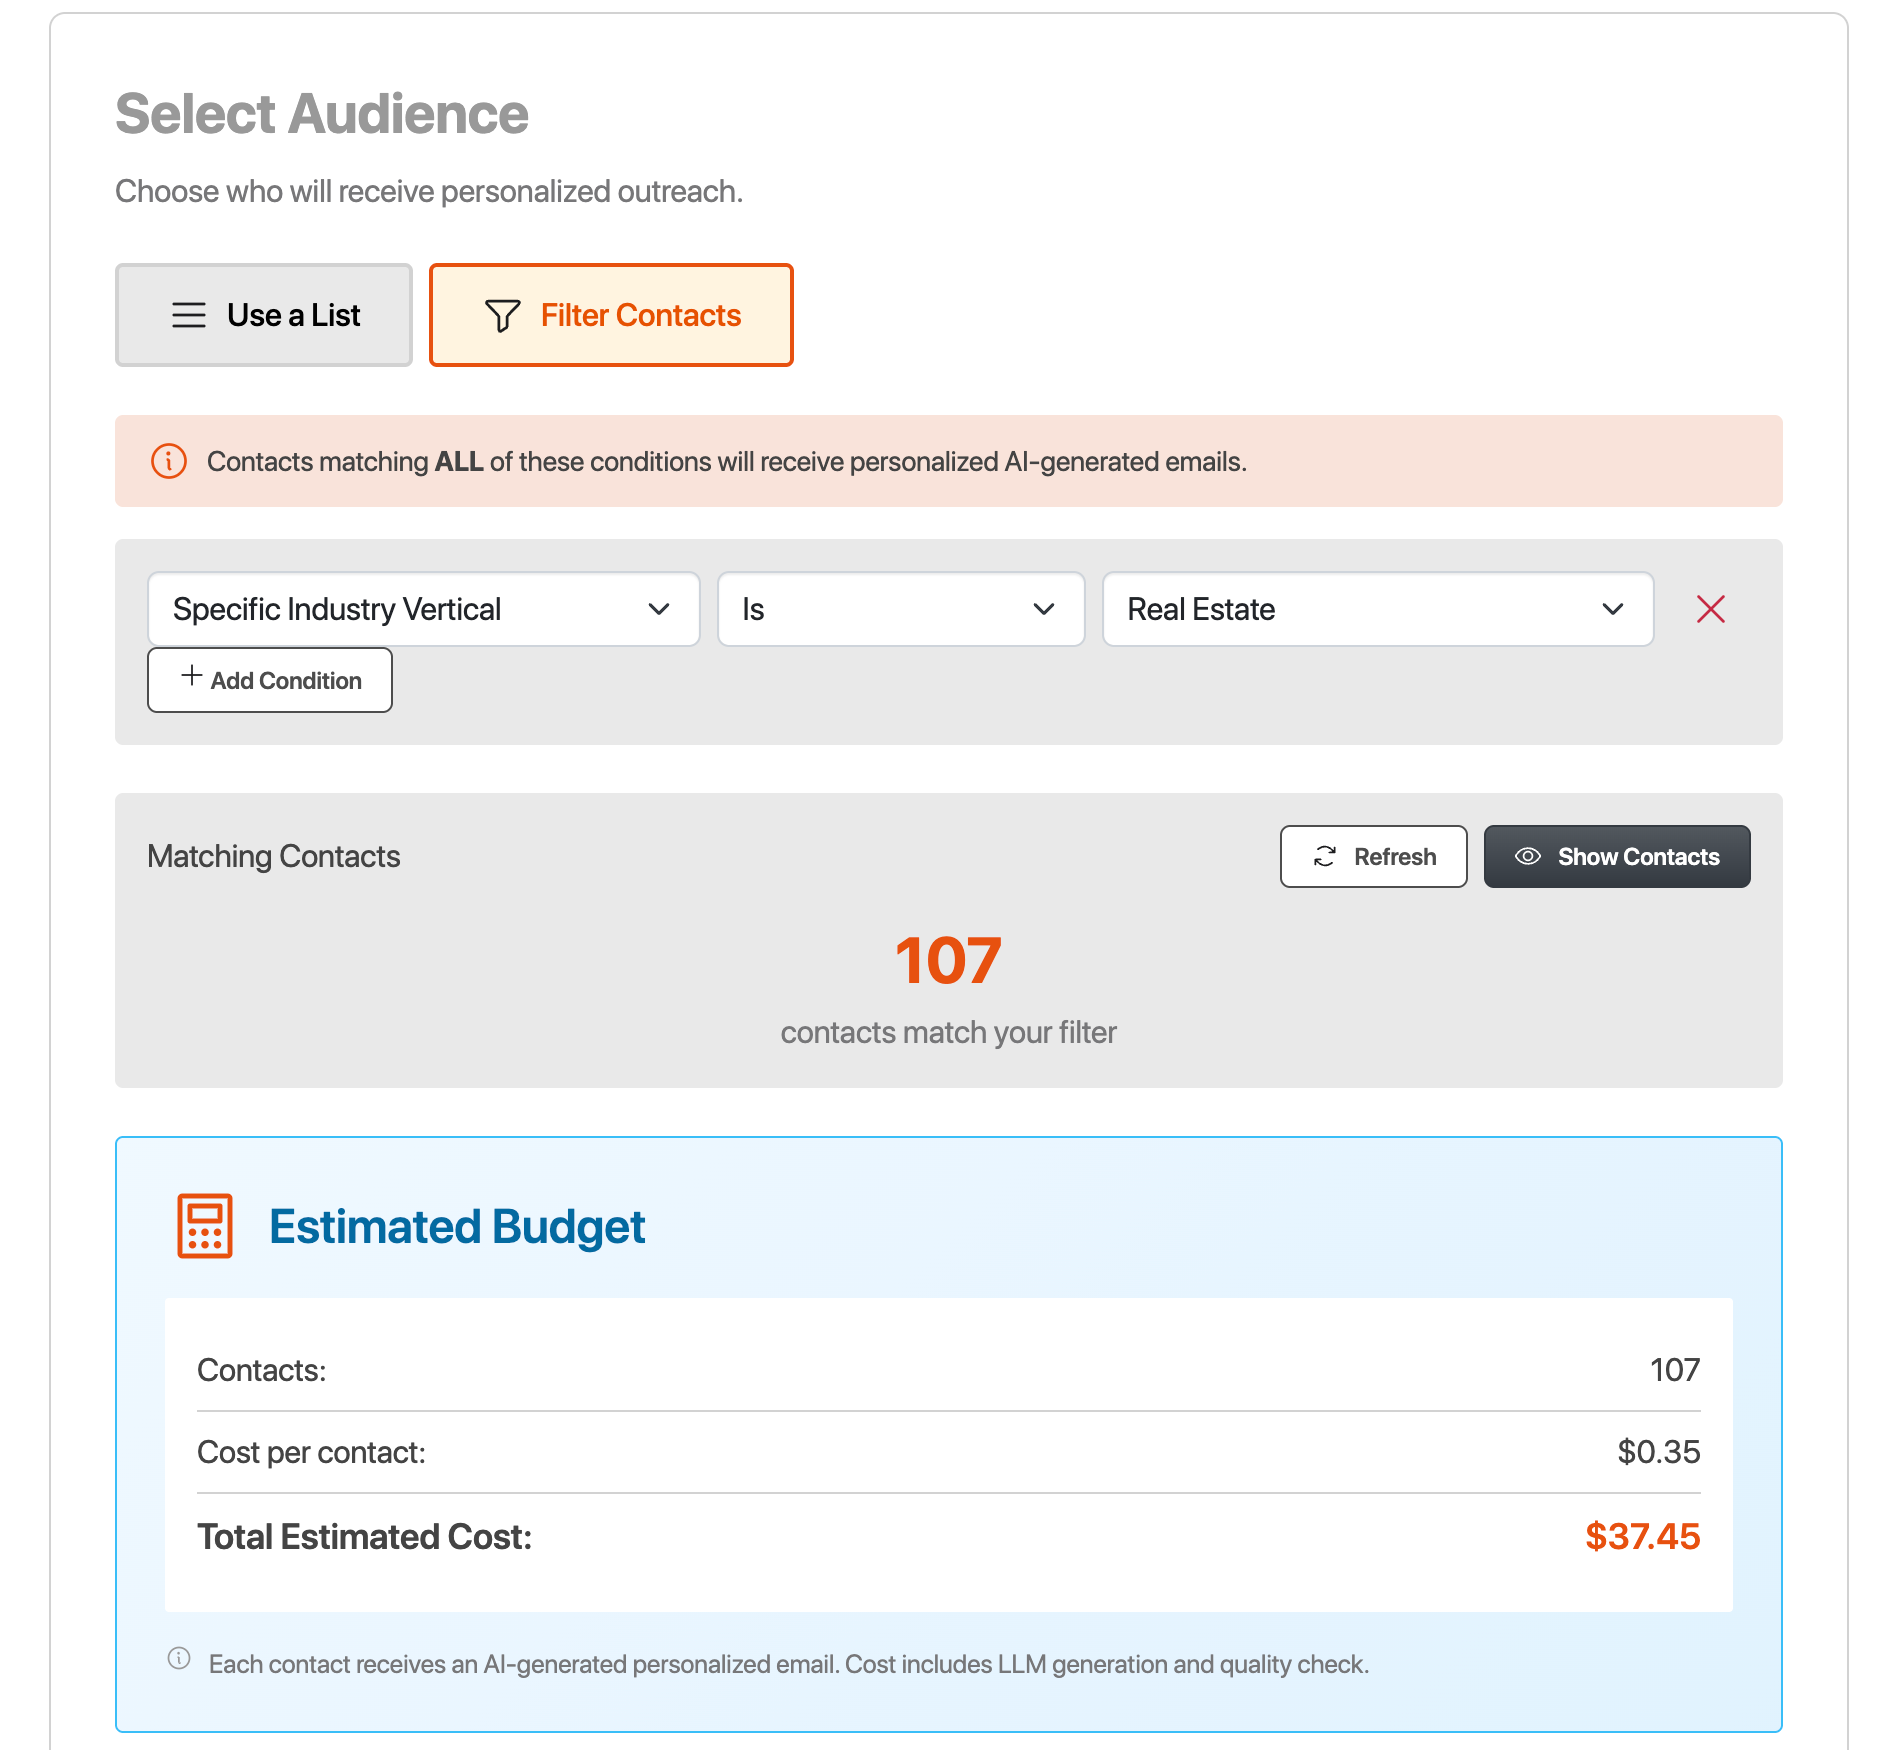
Build the audience with Use a List or Filter Contacts.
Filters are field, operator and value conditions, and every condition must match for a contact to be included — for example, field Specific Industry Vertical, operator Is, value Real Estate. The wizard shows a live match count as you build the filter, with Refresh to update it and Show Contacts to inspect exactly who qualifies.
The count is who will actually be emailed. Contacts who have opted out of emails, or who have no email address, are shown in the preview locked — struck through, with the reason beside them and the checkbox disabled — and are left out of the count and the cost. You can also deselect anyone you do not want included.
Only contacts matching all conditions — or everyone on the chosen list — receive emails. No one outside the defined audience is emailed.
Set the schedule and confirm the cost (Step 3: Schedule)
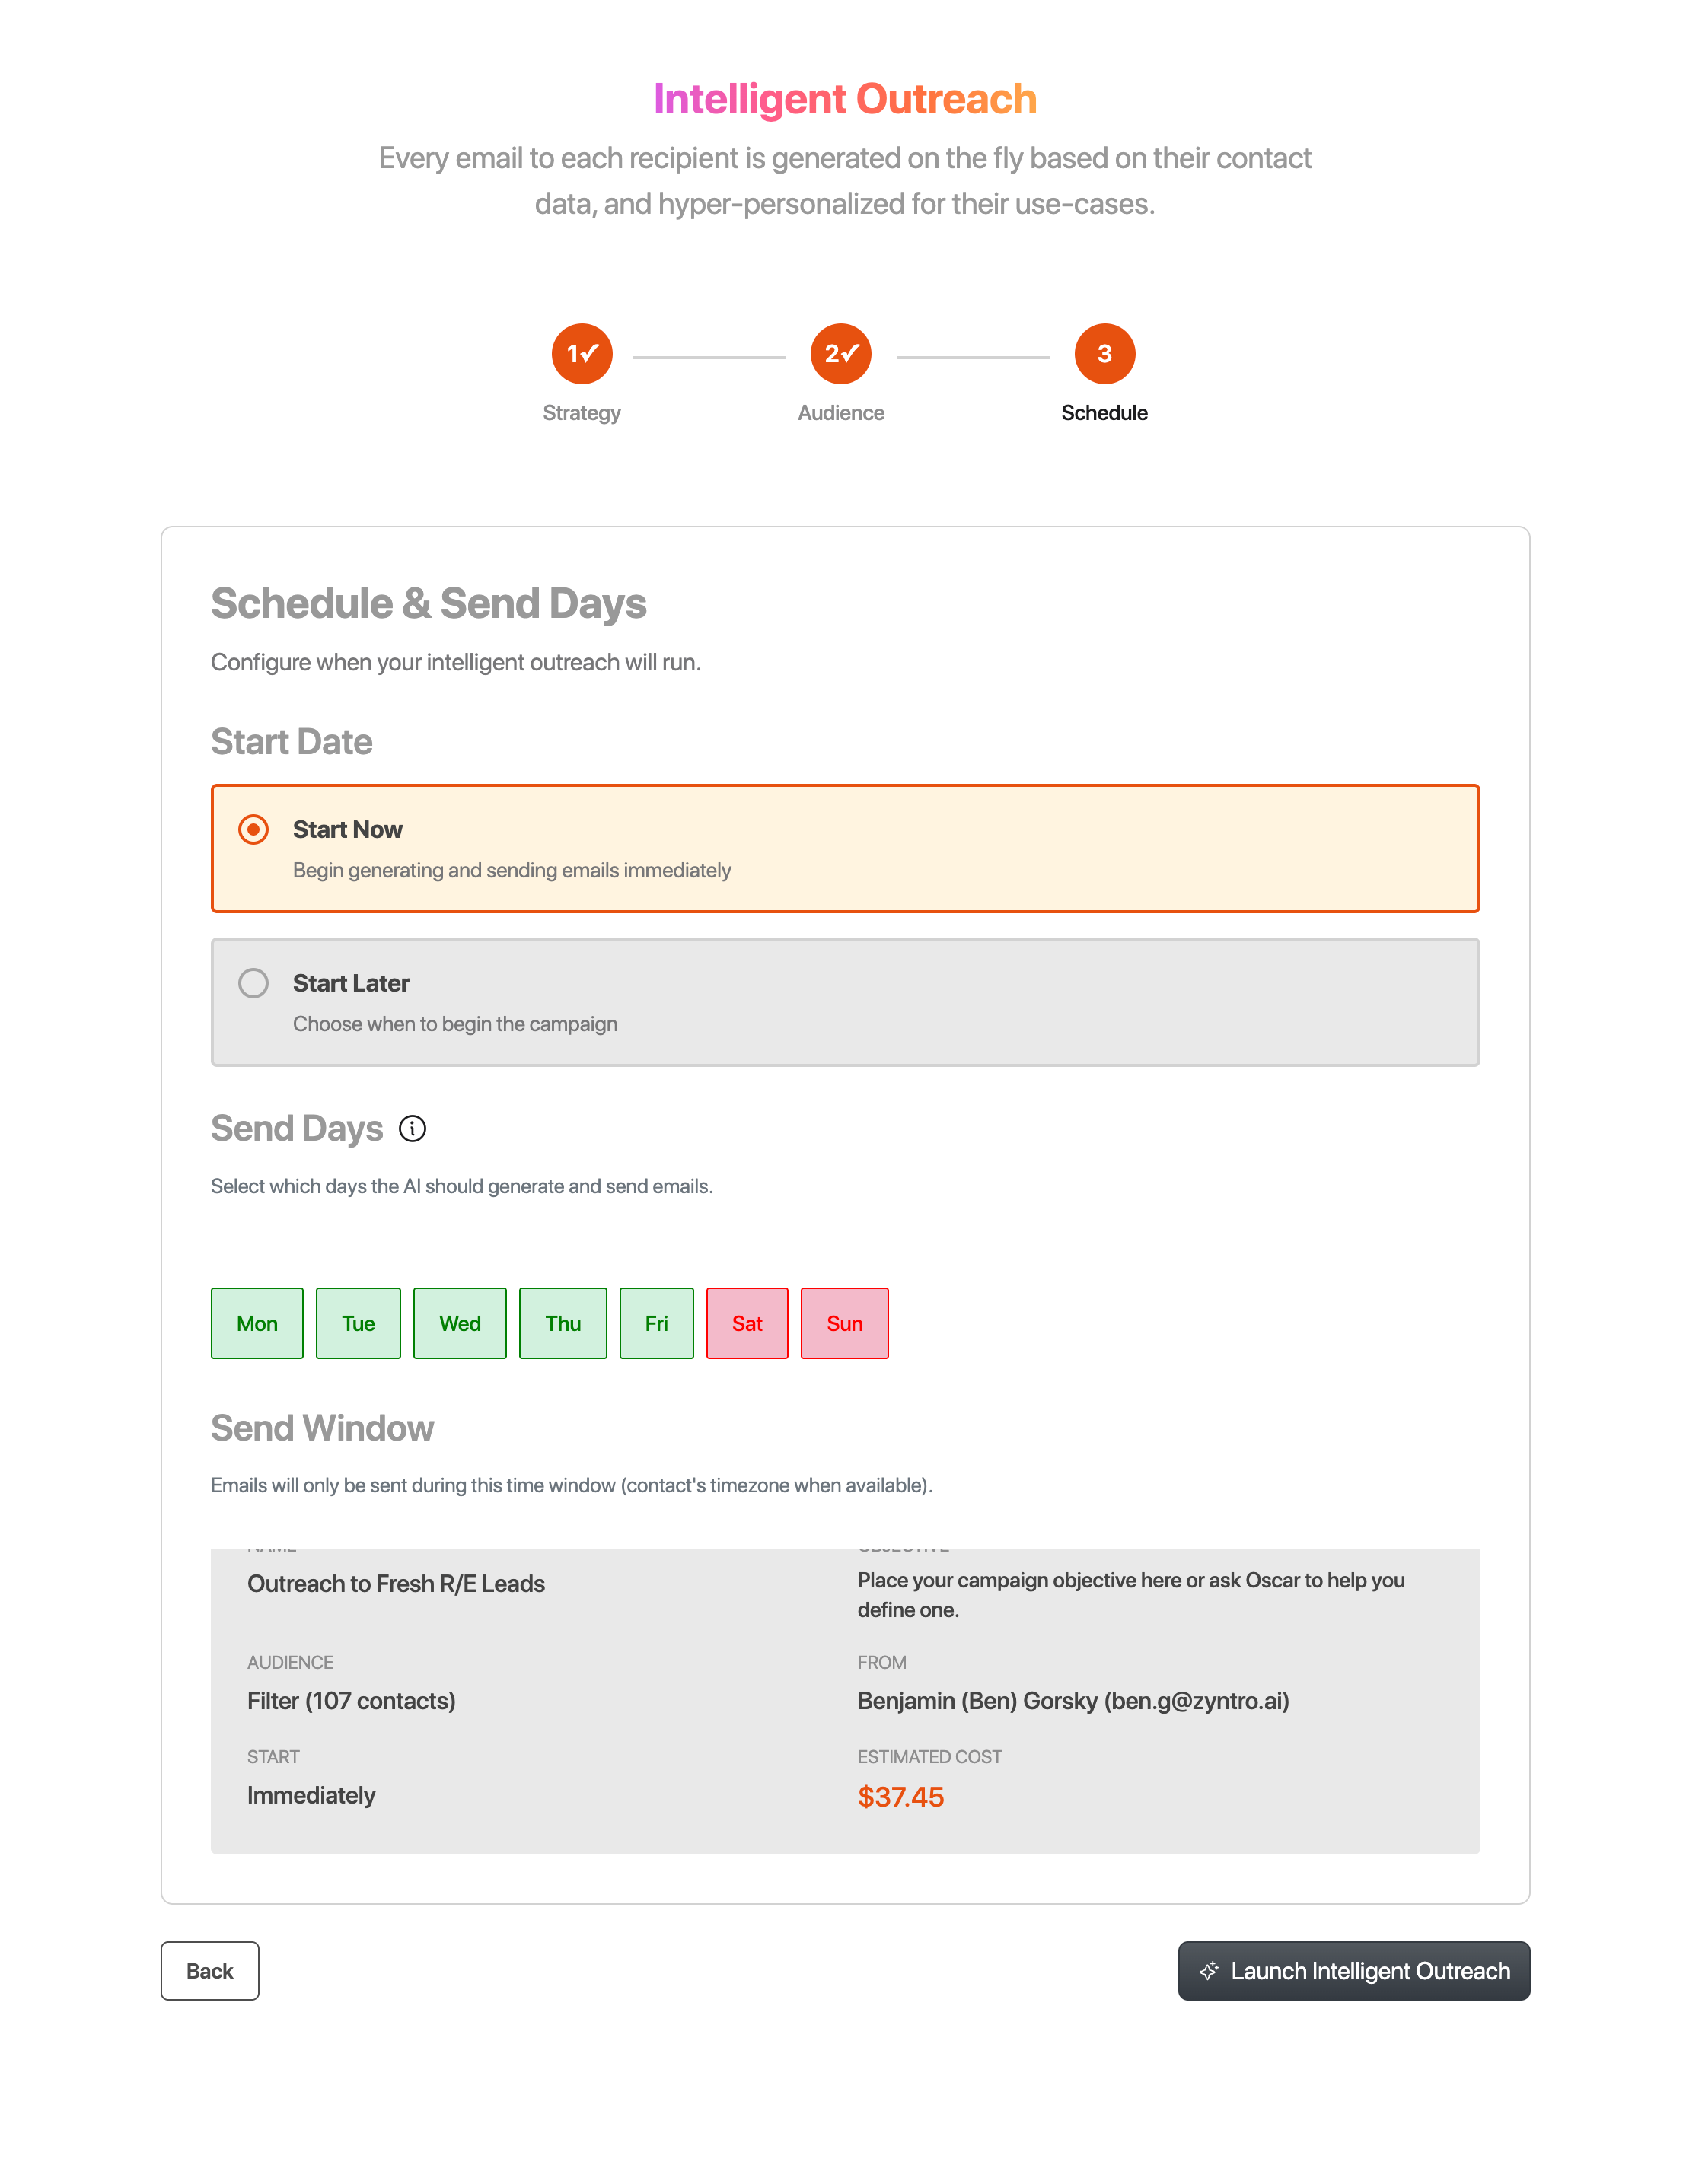
The Schedule step controls when emails are written and sent.
- Start Date: choose Start Now (the default) to begin immediately, or Start Later to pick a start date.
- Send Days: switch on the days of the week when emails are written and sent. Monday to Friday are on by default; Saturday and Sunday are off.
- Send Window: restrict sending to a time window, with a Timezone beside it. The window and the send days are both read in that timezone, which defaults to your organization's. Set it to the zone you think in, and 9am means 9am there.
Before launch the wizard shows the matching-contact count and what the campaign will cost — for example, 107 contacts at $0.50 each. That per-contact charge covers writing the email and reviewing it.
Launching opens a confirmation panel, and nothing is created until you confirm there. It shows the contact count, the cost of writing the emails, the campaign total, your wallet balance and what is needed to start. Create & Schedule stays disabled until your balance covers it, and the reason is stated if it does not.
The balance has to cover more than the campaign total — 1.2 times it. A campaign is never the only thing drawing on your account while it runs: replies come back and get processed, and other work keeps going. A balance that exactly covered the campaign would leave everything else to fail halfway through.
Result
Your broadcast is running. Each matching contact gets an email written individually for them, reviewed before it goes out, and sent only on your selected Send Days and within your Send Window.
Open the campaign to watch it work. You can see every email written and sent, along with opens, clicks, replies and engagement stats, and open any single delivery to read exactly what that contact received and anything they replied.
You stay in control throughout: the campaign can be paused, cancelled or deleted. Emails that have already been sent cannot be recalled, so confirm the audience and the objective before launch.
Important: An Intelligent Outreach broadcast sends a single email per contact — it is not a multi-touch campaign. For long-term, multi-step follow-up, use Communications > Email > Sequences instead.
Troubleshooting
Every filter condition must match for a contact to be included. Relax or remove conditions until the count reflects your intended audience, and use Show Contacts to see exactly who qualifies.
Only contacts who can be emailed are counted. Anyone who has opted out of emails, or who has no email address on file, is excluded — shown locked in the preview with the reason, and totalled in a note above the table. If everyone matching is excluded, scheduling says so rather than reporting an empty filter.
The panel states why. The usual reason is that your wallet balance does not cover 1.2 times the campaign total, in which case it names the exact shortfall — top up and reopen the panel. It will also block when the audience is empty.
Emails are written and sent only on the selected Send Days and within the configured Send Window, read in the timezone set beside the window. Check the Schedule step, and the campaign's own page, to confirm the days, the window and the timezone match what you intended. Campaigns created before the timezone control existed are read in UTC.
Every generated email is reviewed before it can send. One that fails the review is held rather than delivered, so nothing goes out that does not meet your mandates and brand voice. The campaign carries on with the rest of the audience.